Tips For Printing High Quality Photos

Tips For Printing High Quality Photos
The days of relying on film and photo development outlets for your finished photos, often enduring long wait times, are over. The evolution of cameras, smartphone technology, and printers is advanced, and we no longer need to use film.
Many of us now use gadgets such as memory cards, digital cameras, and smartphones. No film to worry about and there is room for hundreds or thousands of photos. As easy as it is, taking your digital photos to an instant print machine can still be a hassle.
The printers we have available to us today are incredible. We can print high-quality photos right from home, as many as we want. Many printers offer direct printing from your memory card and the cameras themselves too.
If you are not sure how to get started, the following are 5 tips for printing high quality photos, and they will help point you in the right direction.
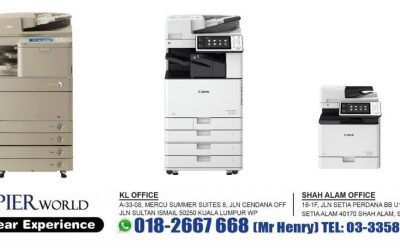
Choosing The Right Printer www.CopierWorld.my
If you want high quality photos, you will want to use either a photo-capable color inkjet printer, or a printer designed specifically for printing photos. If you are only looking to purchase a regular multi function inkjet printer, look for a model with high resolution, at least 2,400 dpi (dots per inch). 4,800 dpi or higher is better, if you can find an affordable model. Some dedicated photo printers have a resolution of up to 9,600 dpi.
A printer with a preview screen is an excellent way to view the image before you print. However, you may want to print a sample image on plain paper, just to make sure it will turn out how you want. Printing a sample image on plain paper is always a good idea if your printer does not have a preview screen.
Read reviews of the printers you think you may want to purchase. You will find useful information from others who have tried it, which can help you make an informed decision.
Use Original High Resolution Images
No printer can print an amazing photo when the photo file itself is blurry, or taken with a low-resolution camera. Start with a good quality camera with high resolution. A camera with a 5-megapixel photo-capture or higher is ideal, and will allow your photos to be sharp and detailed should you wish to print them in large sizes. Digital cameras have up to 10 or more megapixels now, for the best quality prints.
Adjust your camera’s settings to ensure you are capturing the best image possible. Use the highest resolution level your camera is capable of, and make sure you have familiarized yourself with the camera’s different picture-taking modes to get the best results.
Do not forget to edit your photos before you print as well; small fixes such as red-eye removal and cropping. Editing before you print is a good habit to get into for any type of print job.
The following link is a handy guide for comparing file sizes to print quality.

Choose The Right Photo Paper
The printer manufacturer will state which kind of paper works best for each printer model. Look closely to make sure the model you choose is capable of handling thicker glossy photo paper. Use only the best quality paper recommended.
Also, make sure the model you choose is capable of handling various sizes of photo paper if you want to print more than just 4×6” photos. Some printers can use 4×6” paper, all the way up to 20×30”.
It may be possible to use different paper, but you may compromise the quality of your prints and waste expensive ink if the photos do not turn out well.
Adjust The Printer Settings
Make sure you set your printer to the highest resolution possible. You will also want to make sure it is set to the maximum quality print speed. Read the manual for specific instructions on the photo printing settings for your chosen model.
You may end up having to adjust the speed once you have printed a few pictures, as you will have a better idea of what the proper speed setting is with sample photo outcomes.
If you are seeing color saturation or ink bleeding on your photos, it means the speed is set too slow and too much ink is released onto the same areas. Try increasing the speed until you do not see any saturation or bleeding.
Similarly, if the printed image is faded, your printer is to set to print too quickly. The ink head does not have time to shoot out enough ink before it passes by to the next area.
Adjust Your Printer’s Software Application
The printer settings are usually set to defaults for printing on regular paper. Start by customizing your printer’s settings for optimum picture quality. The settings control color, type of paper, size, format, and quality. You want to set the image to print at the highest possible resolution.
You can accomplish this via your computer in the print menu that pops up when you regularly select your printing options. Your manual will tell you which settings to use for each type of print job for the maximum effect, and you should use this as a main guide, especially until you have printed